You would have seen many of the people editing their photos into movie poster or magazine poster..
So here is also a tutorial from which u can learn such thing...
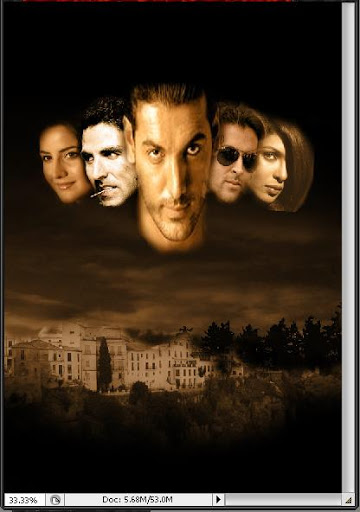
The final edited image would look like this...

So open a new image with width of poster, i used 1170px by 1700px with white background
now changing the backgroung to black..... for that shortcut is ( press d & altr backspace)
Now using two backgrounds 1st of clouds and 2nd of building
1st open the clouds image and place it on the background as shown in the figure..
if u want then u can download clouds background from here
 just note that in above image that upper part of the black background is left...
Now go to image>adjustment>Desaturate or its shortcut is shift+ctrl+u.... so the image would look like this...

Now we are going to place another layer of building on it
if u wanna then u can download the building background from here
now after placing the image of building add desaturation to the building layer by (shift+ctrl+u)
now the image would look like this....

Now adding mask layer by using mask button ..see below image...

select black as foreground (shortcut press d) select brush of size 106 or any size which suitable for u.... and brush the upper part of the building which vanishes that parts from the building image..... now suppose if u made some mistake while brushing then dont worry just again select the white (shortcut press x) and again brush that part with white foreground to rectify the mistake...
Now the image would look like this...

Now add a new layer ( shortcut ctrl+shift+n) name it gradient...
Press G to select gradient tool and select the second option.... when the mouse is hover on the second option it will display foreground to transparent select that option...see below image..

now click on the upper portion of the layer and stretch it towards the bottom... a line would be stretch from upper part to the lower portion see image...

Now after adding the gradient layer it would look like this....

Now its time to place actors picture one by one....
First of all i selected John Abraham's image and using lasso tool selected the face the (not necessary to be perfect....and then select move tool and drag the face above gradient layer... see below image

name the new layer John ( easy to remember & for editing aslo :P)
right click on the layer and select convert to smart objects....

A symbol of smart object would be added to the layer thumbnail.... press ctrl+t to resize john's face and press enter
now add mask using mask button at the bottom....
Now press d to select black as the foreground select brush of size 104 and start brushing around the john's face and remove the unwanted parts of the face..... now again if u made some mistake and u brush on the wrong part or brush more on some parts then dont worry again press x which selects the white as a foreground and brush again which would rectify the mistake ( this is the main benefit of adding mask layer so that if mistake is done u can rectify it :P :P )
Now after brushing on the layer mask ur image would look like this....

Now one by one we add add the snaps of actor/actress and do the same process as we had done with the face of john....
Just be careful in placing the image so that when seen the final image then it should look in a sequence.... so try that everyone's face should be in proper position so that it seems that one person is on the back of the another...
Now adding the Hrithik's snap and dragging it below john's layer
doing same process ... convert to smart objects..... resizing and placing in proper position... adding mask layer... select black as a foreground by pressing d..... brushing the unwanted parts of the face..... now the image look likes this one...

now placing the picture of akshay kumar below hrithik's layer.....
doing the same process as done with the hrithiks layer of converting to smart objects and masking....
now the image would look like this....

Adding new layer of priyanka.....
doing the same process.....
Image looks like this ....

Now the last picture of Katrina...
Doing the same process again... using lasso tool.... select katrina's face... select move tool.. drag it to our document.... convert it to smart object.... resize it and place in proper position behind akshay's image ...then add a mask layer to it by using mask button at the bottom of the palette..
Press d to select black as the foreground and brush of size 104 and brush on the unwanted parts of the face...
Now your image would look like this..

That's it...the part of adding images is completed.... now time to give some finishing touch...
Add a new layer... (shortcut ctrl+shift+n)
Select foreground colour....Color code... #864200.... change blending option to color and change the opacity of the layer to 60%.....
See image...

Now to give some more finishing touch i added a new layer named bottom shadow.... selected a black brush ....of larger size and in the bottom part of the layer brushed it in U shape to give some nice rounded shape shadow....see image below...
For finishing u can also add a new layer above gradient layer and add a new adjustment layer of brightness/contrast...
Now its time to add some text to the images....
So after adding text layers ... our final image looks likes..... carefully see the text in the final image.... u can also edit such characters by the characters palette on the right side panel...
Note:
- This tutorial would help u to know more about the masking technique use in the photoshop....... after having grip on masking technique u would enjoy editing images...
- Such tutorials can be found on internet..... but this proves that from little efforts i can do it then u can also do that...
- Knowledge is boon when use in constructive work..... so dont use such techniques to harm others
- Enjoy editing pictures with true spirit.


2 comments:
Great work brother, :D
thnks mac.....
Post a Comment